
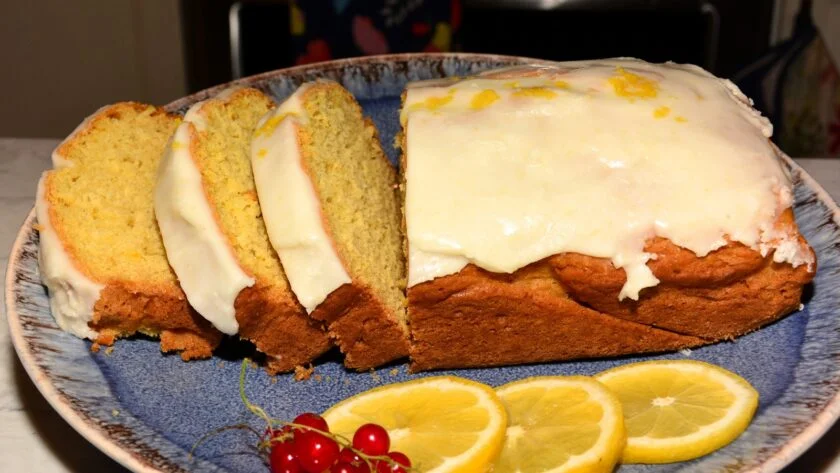
Welcome to your new favorite baking adventure! This homemade lemon loaf recipe is so scrumptious, you might just forget about those Starbucks versions. With its bright citrus flavor and moist texture, this cake is perfect for any occasion, whether it’s a cozy afternoon snack or a delightful dessert after dinner. Let’s dive into this recipe and explore the amazing benefits of the ingredients that make this lemon loaf not only delicious but also nutritious!

Why You’ll Love This Lemon Loaf Recipe
Bright and Zesty Flavor
This lemon loaf recipe is bursting with fresh lemon goodness! Thanks to the generous amount of lemon zest and juice, each bite is filled with a vibrant zing that will brighten your day. The balance of sweetness and tartness makes it irresistible.
Health Benefits of Key Ingredients
Before we get started, let’s talk about the wonderful health benefits of the key ingredients in this recipe.
Lemons: A Citrus Superstar
Lemons are not just tasty; they’re packed with health benefits:
- Rich in Vitamin C: Lemons are an excellent source of vitamin C, which boosts your immune system and supports overall health. It helps your body fight off colds and infections, making it a great addition to your diet.
- Antioxidants Galore: The antioxidants in lemons help reduce inflammation and protect your body from oxidative stress, which can lead to chronic diseases.
- Digestive Aid: The acidity of lemons can aid digestion and promote a healthy gut. Plus, they contain soluble fiber, which supports digestion and can help with weight management.
- Skin Benefits: Vitamin C in lemons is crucial for collagen production, helping maintain skin elasticity and reducing signs of aging.
Oat Milk: A Creamy Alternative
Using oat milk in this recipe not only makes it delicious but also adds a range of benefits:
- Heart Health: Oat milk is rich in beta-glucans, a type of soluble fiber that helps lower cholesterol levels, promoting heart health.
- Lactose-Free: For anyone who is lactose intolerant, oat milk is a perfect alternative that doesn’t compromise on creaminess.
- Nutrient Boost: Many brands fortify oat milk with vitamins and minerals, such as calcium and vitamin D, making it a nutritious choice for your baking needs.
- Environmentally Friendly: Oat milk has a lower environmental impact compared to dairy, making it a sustainable choice for eco-conscious bakers.
Soy Milk: A Nutritious Option
If you prefer soy milk, you’re in for a treat with its numerous benefits:
- High in Protein: Soy milk is a fantastic source of plant-based protein, making it a great option for those looking to boost their protein intake without animal products.
- Cholesterol-Lowering: Research has shown that soy milk can help lower LDL cholesterol levels, supporting heart health.
- Bone Strength: Fortified soy milk often contains calcium and vitamin D, essential for maintaining strong bones and preventing osteoporosis.
- Versatile and Delicious: Soy milk is creamy and works wonderfully in baking, adding depth to your recipes.
What is Zesting?
Now, let’s talk about zesting! Zesting is the process of removing the colorful outer layer of citrus fruit peels. For this recipe, zesting lemons is key to bringing out the full flavor profile of the lemon loaf recipe.
Benefits of Zesting Lemons
- Intense Flavor: Lemon zest adds a concentrated citrus flavor without the acidity of lemon juice. This depth of flavor is what makes your lemon loaf recipe truly shine.
- Aromatic Qualities: The essential oils found in the zest contribute a wonderful aroma, making your kitchen smell fantastic as it bakes.
- Nutritional Boost: Zest contains beneficial nutrients and antioxidants, adding an extra health kick to your baked goods.
Ingredients for Your Lemon Loaf Recipe
Now that we’re all excited about the benefits, here’s what you’ll need to whip up this delightful lemon loaf recipe!
Dry Ingredients
- 2 cups all-purpose flour: This forms the base of your cake and gives it structure.
- ¾ cup white sugar: For that perfect touch of sweetness.
- 1 tsp baking soda: Helps the cake rise and stay light.
- 1 tsp baking powder: Works in tandem with baking soda for a fluffy texture.
- 2 tbsp lemon zest (from about 3 medium-sized lemons): For that bright, zesty flavor.
Wet Ingredients
- 1 ¼ cups milk or plant-based milk (preferably oat, but soy works great too): Adds moisture and richness.
- ½ cup butter (regular or vegan): Essential for creating that moist texture.
- 1 tbsp lemon juice: Enhances the citrus flavor and adds acidity.
- 1 tsp lemon extract: Boosts the lemon flavor for an extra punch.
Icing Ingredients
- 1 ¼ cups icing sugar: Sweetens the cake and gives it that delightful glaze.
- 2 ¼ tsp milk or plant-based milk: Helps create the perfect consistency for your icing.
- 3 tsp lemon juice: Adds tanginess to the icing.
- 1 tsp lemon extract: Enhances the overall lemony goodness.
- ½ tsp lemon zest: A little extra zest for added flavor in the icing.
Step-by-Step Guide to Making Your Lemon Loaf Recipe
Step 1: Preheat Your Oven
First things first, preheat your oven to 350°F (175°C). This is crucial for ensuring your cake bakes evenly and comes out perfectly fluffy.
Step 2: Prepare Your Loaf Pan
Grab a 9.5” x 5” loaf pan and line it with parchment paper. This will help prevent the cake from sticking and make for easy removal once it’s baked.
Step 3: Mix Your Dry Ingredients
In a large mixing bowl, combine the flour, sugar, baking soda, and baking powder. Whisk everything together thoroughly to ensure an even distribution of the dry ingredients, then set it aside.
Step 4: Zest Those Lemons!
Now for the fun part—zesting! Take your medium-sized lemons and zest them using a zester or a microplane. You’ll want to gather about 2 tablespoons of zest for the cake. Don’t forget to set aside about ½ teaspoon for the icing later on! This step may take a little time, but trust us, the flavor payoff is worth it.

Step 5: Combine Your Wet Ingredients
In a microwave-safe measuring cup, add your ½ cup of butter and melt it in the microwave for about 30 seconds. Once it’s melted, remove it and add the remaining wet ingredients: milk, lemon juice, lemon extract, and the zest. Mix everything together well. Don’t worry if the mixture looks a little curdled; that’s completely normal!
Step 6: Bring It All Together
Now it’s time to combine your wet and dry mixtures! Pour the wet mixture into the bowl with the dry ingredients and gently fold everything together using a spatula. Be careful not to overmix; it’s okay if the batter is a bit lumpy. This will help keep your lemon loaf light and airy.
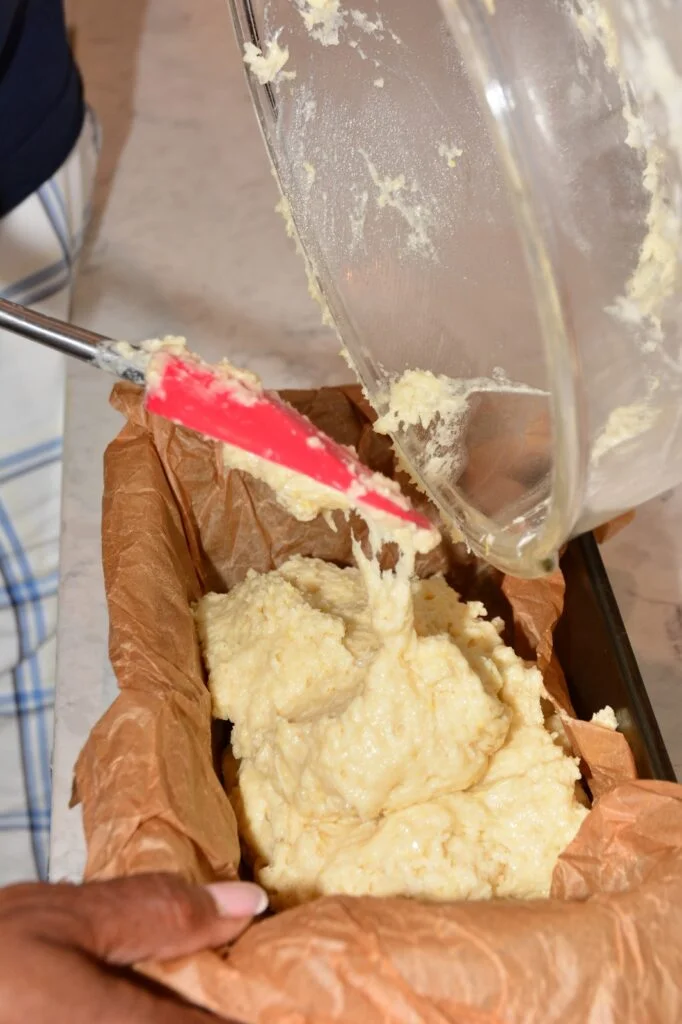
Step 7: Ready to Bake!
Pour the batter into your prepared loaf pan and pop it in the oven. Bake for about 45 minutes. After 45 minutes, check your cake by inserting a knife into the center. If it comes out clean, you’re good to go! If not, give it a few more minutes and check again.
Step 8: Let It Cool
Once baked, remove the loaf from the oven and set it aside on a cooling rack. It’s important to let it cool for about an hour before icing it. Patience is key here, but the delicious smell will keep you motivated!
Step 9: How to Make the Icing
While your cake is cooling, let’s make that irresistible lemon icing! In a medium-sized bowl, combine the icing sugar, lemon juice, lemon extract, and lemon zest. Mix well until combined. Gradually add the milk while stirring to avoid making the icing too runny. The goal is to achieve a thick consistency that won’t drip down the sides of your loaf.
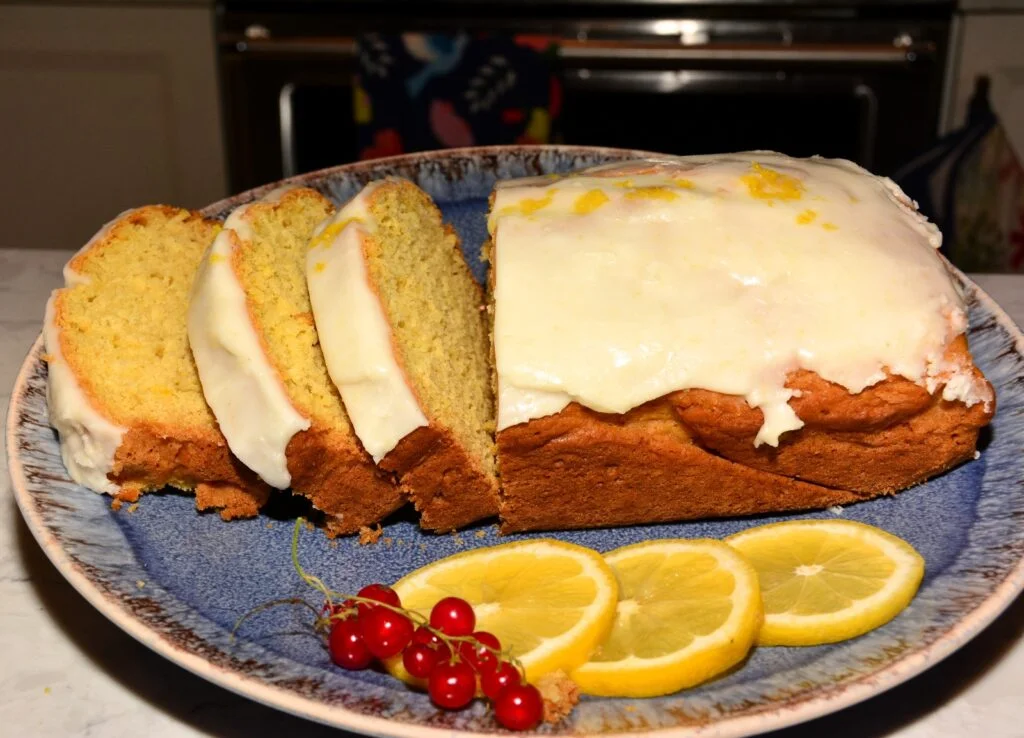
Step 10: Ice the Cake
Once your lemon loaf has cooled completely, it’s time to ice it! Using the underside of a large spoon, spread the icing over the top of the loaf. Don’t worry about making it perfect; a little rustic charm adds to the homemade vibe!
Tips for the Perfect Lemon Lemon Loaf
- Use Fresh Ingredients: For the best flavor, always use fresh lemons and high-quality butter or plant-based alternatives.
- Room Temperature Ingredients: Ensure that your butter and milk are at room temperature. This helps create a smoother batter.
- Storage: Any leftover lemon loaf can be stored in an airtight container at room temperature for up to seven days. For longer storage, wrap it tightly and freeze for up to three months.
- Customization: Feel free to get creative! You can add poppy seeds for a lovely texture or substitute some of the all-purpose flour with whole wheat flour for a healthier twist.

Absolutely Delicious Lemon Loaf Recipe: Even Better Than Starbucks?
Equipment
- 1 Large mixing bowl
- 1 Spatula
- 1 glass measuring cup
- 1 medium bowl
- 1 plate optional
- Measuring cups
- Measuring spoons
- zester or microplane
Ingredients
Dry Ingredients
- 2 cups all-purpose flour: This forms the base of your cake and gives it structure.
- ¾ cup white sugar: For that perfect touch of sweetness.
- 1 tsp baking soda: Helps the cake rise and stay light.
- 1 tsp baking powder: Works in tandem with baking soda for a fluffy texture.
- 2 tbsp lemon zest from about 3 medium-sized lemons: For that bright, zesty flavor.
Wet Ingredients
- 1 ¼ cups milk or plant-based milk preferably oat, but soy works great too: Adds moisture and richness.
- ½ cup butter regular or vegan: Essential for creating that moist texture.
- 1 tbsp lemon juice: Enhances the citrus flavor and adds acidity.
- 1 tsp lemon extract: Boosts the lemon flavor for an extra punch.
Icing Ingredients
- 1 ¼ cups icing sugar: Sweetens the cake and gives it that delightful glaze.
- 2 ¼ tsp milk or plant-based milk: Helps create the perfect consistency for your icing.
- 3 tsp lemon juice: Adds tanginess to the icing.
- 1 tsp lemon extract: Enhances the overall lemony goodness.
- ½ tsp lemon zest: A little extra zest for added flavor in the icing.
Instructions
Step 1: Preheat Your Oven
- First things first, preheat your oven to 350°F (175°C). This is crucial for ensuring your cake bakes evenly and comes out perfectly fluffy.
Step 2: Prepare Your Loaf Pan
- Grab a 9.5” x 5” loaf pan and line it with parchment paper. This will help prevent the cake from sticking and make for easy removal once it’s baked.
Step 3: Mix Your Dry Ingredients
- In a large mixing bowl, combine the flour, sugar, baking soda, and baking powder. Whisk everything together thoroughly to ensure an even distribution of the dry ingredients, then set it aside.
Step 4: Zest Those Lemons!
- Now for the fun part—zesting! Take your medium-sized lemons and zest them using a zester or a microplane. You’ll want to gather about 2 tablespoons of zest for the cake. Don’t forget to set aside about ½ teaspoon for the icing later on! This step may take a little time, but trust us, the flavor payoff is worth it.
Step 5: Combine Your Wet Ingredients
- In a microwave-safe measuring cup, add your ½ cup of butter and melt it in the microwave for about 30 seconds. Once it’s melted, remove it and add the remaining wet ingredients: milk, lemon juice, lemon extract, and the zest. Mix everything together well. Don’t worry if the mixture looks a little curdled; that’s completely normal!
Step 6: Bring It All Together
- Now it’s time to combine your wet and dry mixtures! Pour the wet mixture into the bowl with the dry ingredients and gently fold everything together using a spatula. Be careful not to overmix; it’s okay if the batter is a bit lumpy. This will help keep your poundcake light and airy.
Step 7: Ready to Bake!
- Pour the batter into your prepared loaf pan and pop it in the oven. Bake for about 45 minutes. After 45 minutes, check your cake by inserting a knife into the center. If it comes out clean, you’re good to go! If not, give it a few more minutes and check again.
Step 8: Let It Cool
- Once baked, remove the loaf from the oven and set it aside on a cooling rack. It’s important to let it cool for about an hour before icing it. Patience is key here, but the delicious smell will keep you motivated!
Step 9: How to Make the Icing
- While your cake is cooling, let’s make that irresistible lemon icing! In a medium-sized bowl, combine the icing sugar, lemon juice, lemon extract, and lemon zest. Mix well until combined. Gradually add the milk while stirring to avoid making the icing too runny. The goal is to achieve a thick consistency that won’t drip down the sides of your loaf.
Step 10: Ice the Cake
- Once your lemon loaf has cooled completely, it’s time to ice it! Using the underside of a large spoon, spread the icing over the top of the loaf. Don’t worry about making it perfect; a little rustic charm adds to the homemade vibe!
Enjoying Your Lemon Loaf
Now that your lemon loaf recipe is ready, it’s time to enjoy it! This delightful treat is fantastic on its own, but if you want to elevate it even further, consider serving it with fresh berries, a dollop of whipped cream, or a scoop of dairy-free ice cream. Pair it with your favorite cup of tea or coffee for a truly delightful experience.
Serving Suggestions
This lemon loaf recipe is not just delicious; it’s incredibly versatile. Serve it at brunch, as a dessert, or even as a midday snack.
Like Our Lemon Loaf Recipe? Try these other Deserts!
Evaporated Milk Pecan Pie Recipe: