
The Honey Maid Graham Cracker Crust Recipe is the ultimate shortcut to homemade pie perfection. With just a few pantry staples, this crust delivers a buttery, golden base that’s sweet, crunchy, and incredibly easy to make. Whether you’re a seasoned baker or just getting started in the kitchen, this recipe makes crafting a graham cracker pie crust simple and stress-free. It’s the go-to crust for cheesecakes, cream pies, and summer fruit pies—and once you taste it, you’ll see why it’s a favorite in kitchens across America.
Honey Maid: A Trusted Name in Crunchy Goodness
Honey Maid is a household name known for its iconic graham crackers—a snack that’s been loved by generations. Owned by Mondelez International, Honey Maid began its delicious journey in the 1920s. With a focus on wholesome ingredients and classic flavors, the brand has built a reputation for creating products that bring comfort and nostalgia to snack time and dessert making. Their graham crackers are made with real honey, no high-fructose corn syrup, and are perfect for everything from s’mores to—you guessed it—pie crusts.
Exploring the World of Pie Crusts: A Brief History
Pie crusts have been a beloved part of culinary traditions around the globe for centuries. In Europe, shortcrust pastry—a mix of flour, fat, and water—dates back to medieval times. It’s still widely used in British meat pies and French quiches. In America, buttery, flaky pie crusts became iconic, especially in the South where fruit pies and cobblers reign supreme.
Graham cracker crusts, on the other hand, are uniquely American. Popularized in the 20th century, they offered a no-fuss alternative to traditional pastry crusts. Loved for their sweet crunch and easy prep, graham cracker crusts quickly became a staple for chilled pies, cheesecakes, and holiday desserts.
Best Pies to Make with Honey Maid Graham Cracker Crust
The versatility of this crust is where it truly shines. Try it with these delicious pie recipes:
- Banana Cream Pie – The custard filling and bananas pair beautifully with the sweet crust.
- Chocolate Silk Pie – Rich, decadent, and perfectly complemented by the graham flavor.
- Key Lime Pie – Tart lime filling against the honey-sweet crust is a refreshing dream.
- Peanut Butter Pie – Creamy peanut butter filling with a crunchy base? Yes, please.
- No-Bake Cheesecake – Let the crust chill while the cheesecake sets for an effortless dessert.
Honey Maid Graham Cracker Crust Ingredients
Let’s take a look at what makes this crust both tasty and a little wholesome.
- Honey Maid Graham Cracker Crumbs (1½ cups): These are the star of the show! Graham crackers offer whole grains and a touch of natural sweetness from real honey.
Fun Fact: Graham crackers were originally invented in the 19th century as a health food! - White Sugar (⅓ cup): Adds a touch of sweetness to balance the buttery notes.
Fun Fact: Sugar helps the crust caramelize slightly when baked, giving it that toasty, golden finish. - Melted Butter (6 tablespoons): The binding magic! Butter brings richness and helps the crust hold together when pressed.
Fun Fact: Butter contains vitamin A, which supports healthy skin and eyes. - Cinnamon (½ teaspoon, optional): For a warm, spicy twist that elevates the flavor.
Fun Fact: Cinnamon is loaded with antioxidants and has been used medicinally for centuries.
Utensils You’ll Need for the Honey Maid Graham Cracker Crust Recipe
- Mixing bowl
- Measuring cups & spoons
- Pie plate (8 or 9 inches)
- Spoon or flat-bottomed glass for pressing
- Oven & wire rack for cooling
How to Make Honey Maid Graham Cracker Crust Recipe (It’s So Simple!)
This Honey Maid Graham Cracker Crust Recipe is all about ease. No fancy tools or complicated steps—just mix, press, and bake!
Step-by-Step Instructions for the Honey Maid Graham Cracker Crust Recipe
Step 1: Preheat your oven to 375°F. This helps the crust set quickly and evenly.
Step 2: In a medium-sized mixing bowl, combine the graham cracker crumbs, sugar, melted butter, and optional cinnamon. Mix well until everything is fully blended and the crumbs look like wet sand.
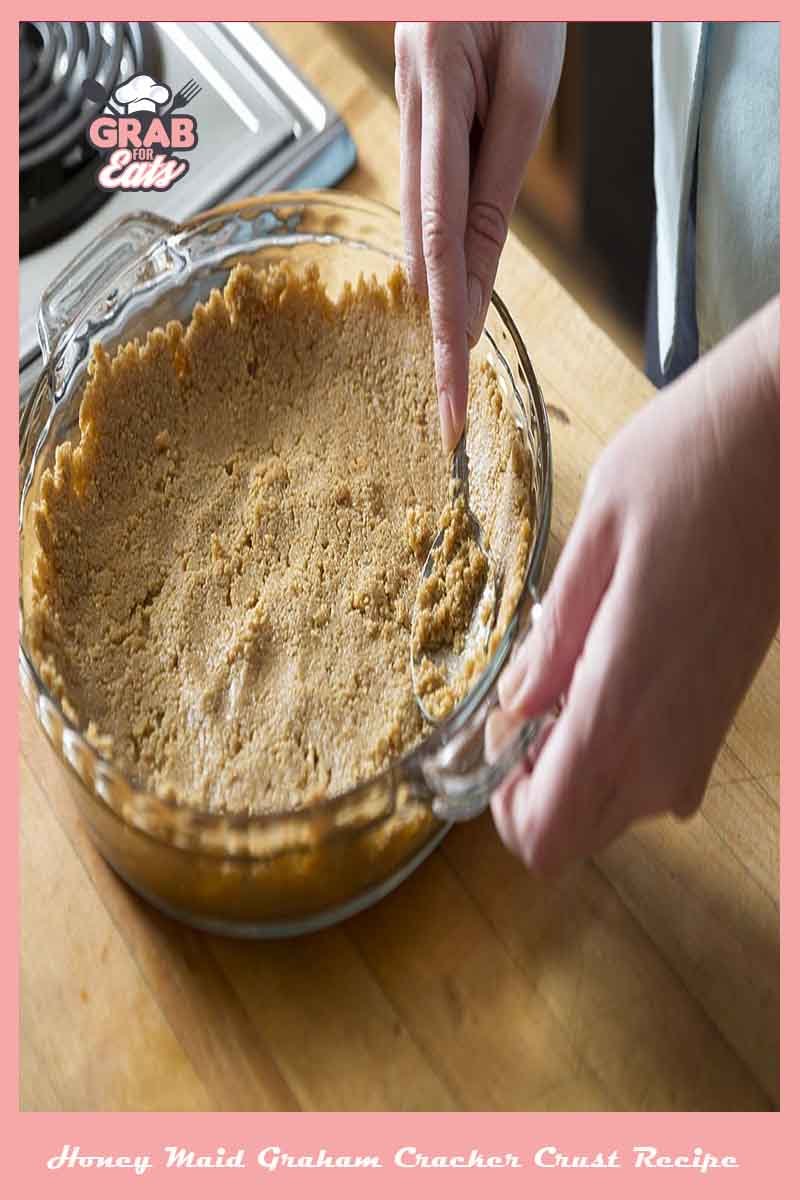
Step 3: Press the mixture firmly into the bottom and sides of a 9-inch pie plate. Use the back of a spoon or a flat-bottomed glass to get a smooth, compact layer.
Step 4: Bake the crust for 7 minutes until it’s golden and slightly firm to the touch.
Step 5: Remove from the oven and place on a wire rack to cool. Let it sit for at least 10 minutes before adding your filling. For no-bake pies, chill the crust for 1 hour instead of baking.
Special Occasions to Enjoy the Honey Maid Graham Cracker Crust Recipe
This recipe is perfect for:
- Thanksgiving – Ideal for pumpkin or pecan pies.
- Christmas – Try it with peppermint or chocolate cream fillings.
- Easter – Fresh fruit tarts and lemon pies shine here.
- Fourth of July – No-bake pies and cheesecakes are picnic-friendly.
- Birthdays & Family Reunions – Easy to prepare and always a crowd-pleaser.

Easy to Make Honey Maid Graham Cracker Crust Recipe
Equipment
- Mixing bowl
- Measuring cups & spoons
- Pie plate (8 or 9 inches)
- Spoon or flat-bottomed glass for pressing
- Oven & wire rack for cooling
Ingredients
- 1½ cups Honey Maid Graham Cracker Crumbs
- ⅓ Cup sugar
- 6 tbsp butter melted
- ½ tsp cinnamon
Instructions
- Preheat your oven to 375°F. This helps the crust set quickly and evenly.
- In a medium-sized mixing bowl, combine the graham cracker crumbs, sugar, melted butter, and optional cinnamon. Mix well until everything is fully blended and the crumbs look like wet sand.
- Press the mixture firmly into the bottom and sides of a 9-inch pie plate. Use the back of a spoon or a flat-bottomed glass to get a smooth, compact layer.
- Bake the crust for 7 minutes until it’s golden and slightly firm to the touch.
- Remove from the oven and place on a wire rack to cool. Let it sit for at least 10 minutes before adding your filling. For no-bake pies, chill the crust for 1 hour instead of baking.
Tips
- Always use melted butter—it helps bind the crumbs better.
- Don’t skip chilling if you’re making a no-bake pie!
- Press the crust firmly to avoid crumbling.
- A dash of vanilla extract or a sprinkle of nutmeg can add depth.
- Avoid overbaking—7 minutes is just right.
- Use a glass pie plate for even baking and a beautiful presentation.
Nutrition
How to Store the Honey Maid Graham Cracker Crust Recipe
To keep your crust fresh:
- Before Filling: Wrap the crust tightly in plastic wrap or foil. Store at room temperature for 2 days or refrigerate for up to 5 days.
- After Filling: Keep in the refrigerator covered, and consume within 3–5 days.
- Freezing: Wrap well in plastic and foil. Freeze for up to 2 months. Thaw in the fridge before using.
Why Everyone Loves the Honey Maid Graham Cracker Crust Recipe
The Honey Maid Graham Cracker Crust Recipe is a true gem for home bakers. It’s easy, affordable, and incredibly versatile—making it ideal for everything from elegant holiday pies to everyday desserts. Whether you’re making a chocolate cream pie or a classic key lime treat, this crust is your dependable, delicious foundation. And because it’s made with Honey Maid graham crackers, you know it comes with quality and nostalgia baked right in. Try it once, and it just might become your go-to crust for life.
Read More: